Minimal Next.js Blog (Part 1 - Hello World)
When I say minimal, I may be understating the intent somewhat, so allow me to clarify what I mean.
My current blog is a WordPress site. Yes, a ubiquitous blogging platform and nothing really of note. So why the change? Well, it's never really felt like a good fit for me. As a developer, I want something more akin to what I'm used to. For instance, I'd like to use GIT source control, and I'd love for my blog to update based on my commits to the Main branch; and possibly a Draft (aka dev) branch.
Additionally, I want firm control over the process and tech. A WP site is excellent, but I feel that it's overkill for a simple blog, and due to its popularity, it's a big moving target for hackers. Lastly, a simple factor is that I cannot be bothered keeping on top of the maintenance required to keep it safe; therefore, it's only a matter of time before it's defaced by an automated bot - bah.
Ok. So time for me to create an MVP list 🤔...
I start with what I want from the current WP site
- Blog posts (Obviously)
- Blog tags (View all posts in a category etc.)
- Miscellaneous pages
and what features I want and currently don't have
- Static website (No need for an actual backend. Safer from hackers due to neglect)
- Automatically update when I commit to the Main branch (CI/CD)
- Markdown support
Project creation
Time for the usual NPM dance to kick the project off
npm init --y
npm install next react react-dom
Next, I add these scripts to the package.json file, as per the Next.js docs.
"scripts": {
"dev": "next",
"build": "next build",
"start": "next start"
}
TypeScript support
It's pretty easy to add TS support to a project these days. However, for Next.js there are a couple of little tricks, so excuse my somewhat weird way of going about this.
npm install typescript @types/react @types/node --save-devThen I add an empty tsconfig.json file which I populate later.
Directory structure
Because I can't run Next.js without the pages directory, I add it and while there also add the ones I envisage that I'm going to need as I build out my blog solution.
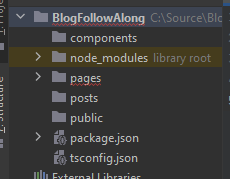
My folder layout is:
- pages (react pages. known Next.js directory)
- posts (blog posts in markdown format)
- public (static files, such as screenshots etc. known Next.js directory)
- Note: these files are served from
/
- Note: these files are served from
- components (react components. known Next.js directory)
Index page
Obviously, there's nothing to serve when the project is empty, so I add my IndexPage component next. To do this, I
create an index.tsx file under the pages directory.
import React from 'react'

const IndexPage = () => <div>Hello World</div>

export default IndexPage
If you haven't already guessed, this will render "Hello World".
Checkpoint
So by now I should have everything to get a basic page loading. My project is currently looking like this:
I need to run the dev command I added in the scripts section earlier to start the dev server.
npm run devYay! Some console output. Looking good.

If I navigate to http://localhost:3000 I should see my IndexPage component rendered on the screen.
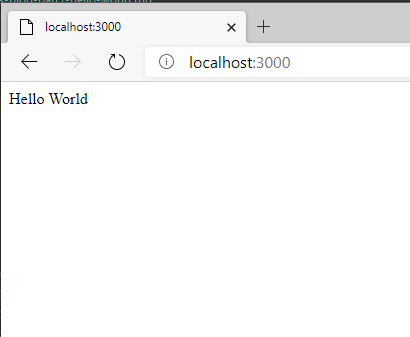
Brilliant! It works.
Finish line
Finished, right? Well almost. Looking carefully at the console output, you'll see that the Next.js framework has populated the tsconfig.json file with its default. Ah ha, the continuation point from early. See, I told you my weird method of adding TS had a purpose. Next, I change a few defaults to suit my own preferences.
I set strict to true. If you want, you can read more about this change on the TS Website.
"strict": true,To ensure I get the most out of type safety, I also enable 'no implicit this', no 'implicit any', and lastly, 'no implicit return types'.
"noImplicitThis": true,
"noImplicitAny": true,
"noImplicitReturns": true,
Even the most astute dev leaves unused code lying around sometimes, and well, lucky for me, TS allows me to say NO 🙅♀️🙅♂️⛔ to unused locals, so I enable this too. Although it won't be the absolute fix to the unused code problem, it sure goes a long way from doing nothing.
"noUnusedLocals": true,Nearly there, just one last thing.
Prettier - love it or hate it, it has a purpose, and I love it. Although, admittedly, I don't need prettier for my blog, I'm used to it and could not be bothered setting up code formatting in my IDE Webstorm. If you're not familiar with prettier, I'd suggest reading their why page.
To install prettier, I simply run this NPM command.
npm install prettier --save-devThen add my configuration to the .prettierrc.json file along with my own preferences.
{
  "semi": false,
  "trailingComma": "none",
  "singleQuote": true,
  "printWidth": 140,
  "tabWidth": 2,
  "endOfLine": "lf"
}
Depending on your editor depends on how one uses prettier. For webstorm, I'm in the habit of Ctrl+Alt+Shift+P whenever I've made changes to a file, so you won't see any fancy script commands added to the package.json file or any fantastic way of making Pettier work automatically.
Yay. FINISHED!
In part 2 I render a list of posts and categories to the screen. Like this part, it's amazing (Self Certified).
Date May 1, 2022